GUIDING CABLE and ST8
first "Guided Light"
November 18,2003 I
picked up a new ST8 camera but had to make a
cable to connect it to the LX200 CCD port.
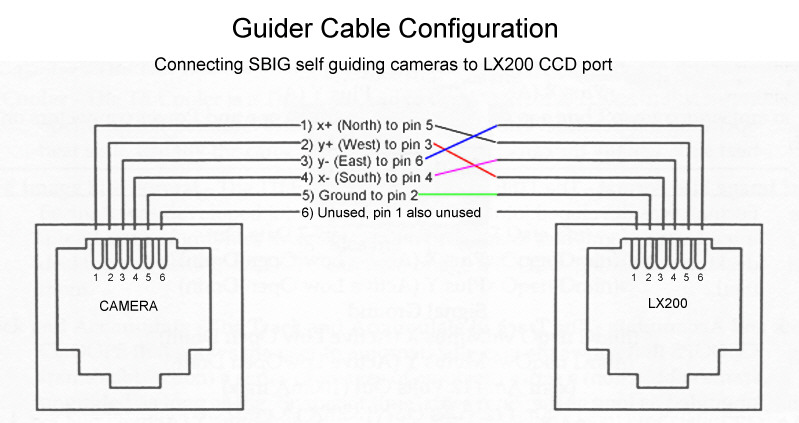
This is a 6 wire cable, the LX200 will only
accept a 6 wire connector, the SBIG camera
will accept a 6 or 8 wire cable, but only
uses 6 wires. To clarify, I am using a CFW-8
filter wheel which has an adapter that
connects to the camera's native DB9 guider
port. The back of the adapter has an RJ11
port that accepts the 6 wire telephone cord
style cable. By looking up the pin outs
published by SBIG and Meade I was able to
line up the proper pins. The pins are
basically reversed on the camera side versus
the telescope side (i.e. pin 6 at the camera
is unused, pin 1 at the telescope is unused).
This means that each end of the cable must be
connected to the appropriate device, there's
no switching cable ends.
Here's the diagram for anyone
who is interested in making such a cable
themselves:
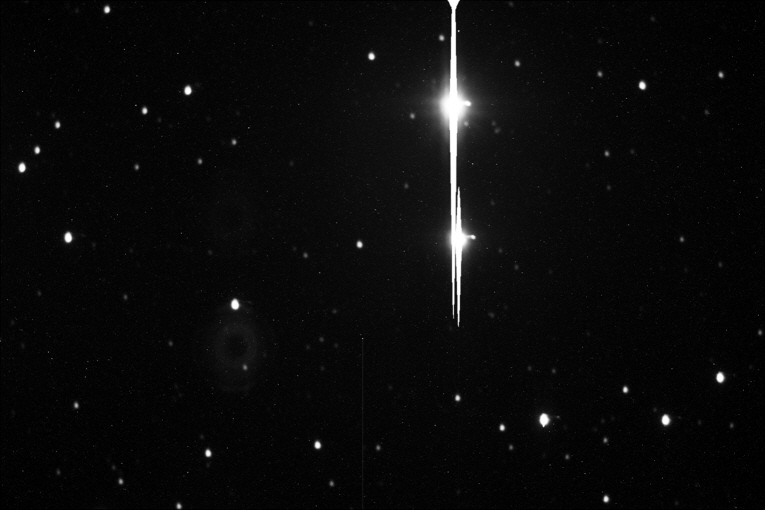
The cable works perfectly. I was
able to test it for just a few minutes before
the clouds rolled in. This image is a piece
of the Pleiades (easy place to find a guide
star). This is a combo of 4x5 minute
exposures. The scope was not balanced and the
image shows a clear up/down star elongation.
More testing is needed to determine how long
I can go with my exposures and what problems
I may need to resolve - polar alignment
adjustments, more PEC training, better scope
balance, etc. Also noted is a reflection of
the corrector plate and secondary
obstruction, looking a bit like a dust
doughnut. I need to start being more
disciplined in my use of flat field
reductions. This image was not reduced at
all, no dark or flat field reductions were
performed. I'm very happy about the small
amount of dark noise in the image.
<< back
