
Imaging with the ETX70 and Meade Electronic Eyepiece
Background
First drafted: 2/4/02
Follow-up 3/10/02: Process improvements and comments in green
I took up the hobby of astronomy in December 2001 when I purchased a Meade ETX 70AT. I have completely fallen in love with the scope and the hobby. I live in a not too light polluted small town in central Massachusetts with a nice patch of sky. In mid-January I decided to try using the electronic eyepiece that came with the telescope for imaging. This is a record of my experiences and the processes and opinions I have formed.
Equipment List
ETX 70AT with AutoStar
Meade B&W electronic eyepiece
Meade #124 2X Barlow
Meade #128 3X Barlow
JMB Class "A" solar filter
Meade #3200 Planetary Filter Set
Added Meade Series 4000 #58 green filter - very nice to have
Compaq Armada M700 laptop running Windows 98
Determining what was needed
The electronic eyepiece has an analog RCA type output cable. I could see images when it was attached to a TV monitor, but I needed the necessary hardware and software to capture the images on the laptop. After looking around for a while I found a nice solution from Belkin. The Belkin Videobus II system provides you with a short USB cable capable of accepting analog video as well as s-video. The USB cable attaches quickly and easily to the USB port on the back of the laptop. The package comes with drivers for the USB cable, PhotoSuite IIIse and VideoWave IIIse. Something along these lines is required to take images electronically into the computer regardless of the source, so I figured that even if results are poor with the electronic eyepiece, the cable and software can be useful with other equipment.
For about $99 I had the necessary components to begin capturing images from the eyepiece into the laptop. Belkin did a very nice job fulfilling my order. The same day I placed my order I received an email stating that my order had shipped and providing me with a package tracking number. I used the cheapest ground shipping and received the package on time in 7 days.
Additional equipment needed to begin imaging
Belkin USB VideoBus II package with PhotoSuite IIIse and VideoWave IIIse, Belkin Part Number: F5U208
I also picked up a copy of Robert J. Stekelenburg's fabulous AstroStack freeware on the internet.
Choosing subjects
One of the things I wanted to be able to do was take images of star fields with an eye towards being able to identify asteroids by seeing them travel through the fields of fixed stars. Vesta seemed a particularly good subject as it is now moving it’s way through Taurus and getting closer and closer to Saturn.
In this I was disappointed. I have been unable to get images of anything but the brightest of objects. This is very limiting, so far I have achieved satisfactory results only when imaging the following subjects: Saturn, Jupiter, Moon, Sun.
Capturing Images
The electronic eyepiece is approximate to the Meade 25mm eyepiece that came with the telescope, although it has a narrower field of view. Once AutoStar is tracking the subject, I focus using the 25mm eyepiece. I then replace the 25mm with the electronic eyepiece, connect to the USB cable, and launch the VideoWave software. When in capture mode (even when not recording) the software shows the output of the eyepiece on the screen.
Now it’s time to turn on the eyepiece and adjust both the contrast and focus. Getting the contrast and focus just right can be a difficult task. I typically adjust the contrast higher and lower in shorter and shorter ranges until zeroing in on the right spot. Then I do the same with the focus. Several iterations of adjusting contrast and focus are required to obtain the clearest results.
At this point the focus and contrast are as good as possible and it’s time to capture some images. A button click in VideoWave begins the capture and displays the elapsed time and some other stats. Another button click stops the capture and prompts for a file name. I try to make the file names as informative as possible, for example: Jupiter1_3x_yellowfilter_30 is a video of Jupiter taken with the 3x Barlow and a yellow filter for 30 seconds. The 1 in Jupiter1 is a serial number in case I take several with the same attributes. I also create folders with names based on the date to help further organize the images.
In theory, the longer the videos you capture, the higher the quality of the final image you make of them. In practice, I have found that recording times between 30 and 60 seconds provide enough material to use effectively. The bigger the files the longer they take to process in AstroStack, so there’s an incentive to keeping them at a manageable size.My preferred approach at this time is to use 5 second videos for Jupiter and Saturn. Using a very nice tool called "AVI2BMP" extract only the best images from the 5 second video and process those using Astrostack, details follow.
Processing the images
For Jupiter and Saturn images, once the 5 second .avi videos have been captured, I load them into AVI2BMP. This utility displays the video as individual frames. I then scroll through the frames, usually just 100 or so, selecting only the best images. On average I find that I select between 10 and 30 frames from the 100 examined. AVI2BMP makes it very easy to scroll through and select, so the whole process usually only takes a couple of minutes.
Once the good images are selected, AVI2BMP enables the user to export those images to individual BMP files that are then processed by Astrostack. A "gotcha" is that when exporting, the default selection is for the program to export ALL frames, not just the ones you selected. Make sure to check off the "selected" box (every time) to avoid having your individual selections ignored and all the frames exported instead.
This method vastly improves the quality of the Saturn and Jupiter images, although I do not find it necessary to take these steps when imaging larger subjects like the Sun and Moon. I was only able to find a download for AVI2BMP at a site that’s all in French, although an English version of the program is available.
This tool is great, although several parts of the program are still in French, like the word "annuler" appearing on most of the "cancel" buttons.
Once the .avi videos have been captured they can be processed and stacked into a composite image by AstroStack. I wont presume to give anyone advice on using this tool. For me it’s been trial and error until I get an end result I’m happy with. A couple of key observations though, when AstroStack comes up, there’s a "Full Picture" checkbox under the Load section. The default is for the checkbox not to be checked, which causes AstroStack to magnify whatever is in the center of the image. This is great for planets, but not so good for the Moon and Sun. The "Full Picture" box must be checked if you want keep the magnification the same. Another thing which will affect the scope of the end result is the "Area" value in the Show Result section. The default value is 192, but there are times when your original image wont fit into that width. To keep large images from getting cropped, you have to increase the width value and re-load your video file. When I’ve finished tweaking the AstroStack results, I save the results file using the same naming conventions that I use for video capture files. I have found that the results from AstroStack are about as good as I can get them so I skip any additional touching up that might be done in PhotoSuite.
The Results so far…
Saturn
This is the very first image I have ever taken. It was taken with the 70AT, electronic eyepiece and 3x Barlow from a 30 second video.
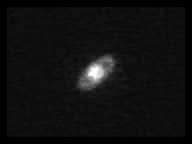
Here’s another Saturn picture taken the following night with the same setup, better processing in AstroStack.
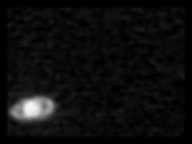
And here’s what I can obtain on almost every imaging session. I have hit a plateau, being able to generate images of this quality all the time, but never anything better. I think I’ve reached the limit of what I can do with Saturn using this combination of gear.

Saturn, 70AT 3x no filter, electronic eyepiece
Jupiter
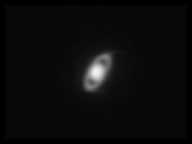
My first images of Jupiter have been a little disappointing (hoping to get better with experience). If you squint really hard you can pretend that the noise in this image is actually weather bands. The image was taken with the 70AT, electronic eyepiece and 2x Barlow, 30 seconds.
Jupiter images are not so disappointing with the AVI2BMP method. As with Saturn, I can get decent images from just about every session.

Jupiter, 70AT 3x no filter, electronic eyepiece
I darkened the second image during processing to highlight the fact that 5 distinct bands are captured. I tried once when the GRS was crossing but couldn’t pick it up. I might have better results capturing Io’s shadow, haven’t tried yet.
The Moon
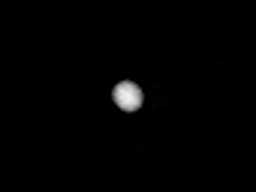
My first moon picture isn’t the greatest either. I’ve only tried once so I’m hoping to get better results with practice. I found that the waning gibbous moon I was shooting was too bright, it overwhelmed the eyepiece making it impossible to find the right contrast and focus. The results were better with the moon filter screwed into the bottom of the eyepiece.
This image was taken with the 70AT and electronic eyepiece (with moon filter) for 30 seconds.
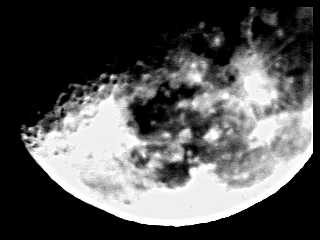
Getting the filtering right seems to be the key to obtaining good Moon images.
70AT 1x electronic eyepiece. This image was taken using the Meade green filter. It shows the overexposure that can occur around the Tycho crater region.
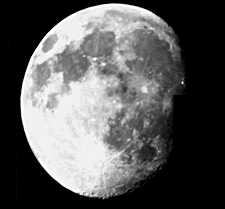
This image was taken using both the green and red filters. Perhaps a little too dark, but the exposure is much better than that of the previous image, and nice details can be seen. These images are mosaics made from multiple images overlapped by hand. This is necessary since I can’t get the whole moon in the electronic eyepiece field of view, particularly when using multiple filters. I need to work on my technique, as a noticeable overlap flaw can be seen at around the 9 o’clock position.
The Sun
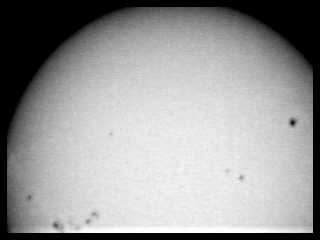
The Sum images turned out much better than I had expected. I again had issues with the eyepiece being overwhelmed with input. In addition to the Solar filter on the front of the telescope, I had to put both the moon filter and the blue filter onto the eyepiece to be able to control the contrast and focus. The filters extend the overall length of the eyepiece and they prevent the eyepiece from going all the way down into the eyepiece holder. This has the undesirable effect of increasing the magnification. I was unable to get the whole ball of the Sun in the image due in part to this issue. Still, several sunspots are shown and I’m happy with this first attempt at the Sun.
The image was taken with the 70AT, solar filter, and electronic eyepiece with both moon and blue filters, 30 seconds.
And another, a mosaic of 3 images overlapped to create a whole Sun.
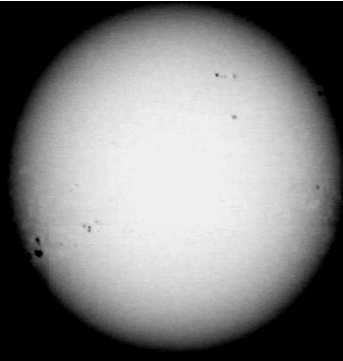
Sun, 70AT 1x, solar filter, green filter